Jersey Knit Applique Technique
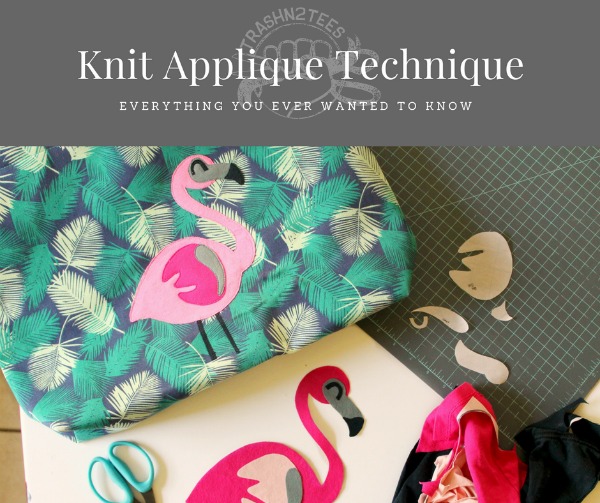
Over the years I've experimented with many different forms of applique, tested 100's of fusible interfacings, spray glue or webbings, and created/sold thousands of applique products around the world. My mission to change the way we consume and create began with upcycling and repurposing t-shirts. TrashN2Tees has been recognized by Martha Stewart and many others for our efforts and design. As the we continue to grow I know it's just as important to share patterns and tutorials that will help you on your creative reuse journey as well. This tutorial can be adapted to fit any scale of project and you can find TrashN2Tees Applique Patterns in the shop.

What you'll need to get started:
Template (Flamingo Pattern)
Some type of fusible web
Note: My favorites really depend on the intricacy of the pattern, the function of whatever it's on, and size. Interfacings & Fusible Webs I recommend for knit applique include: Pellon EZ Steam II, this is one of my go-to products I love that it has a double side sticky which lends itself to working with kids or when completing a larger project with many layers or pieces. Many many tutorials I've read recommend Wonder Under- in a pinch it will do the job, however, wonder under is not my favorite to work with. I find that it doesn't adhere well enough to between fabrics (remember we are talking about knits so it may work well for quilting cotton.) Pellon also has a product called Clear Fuse- this has an aggressive glue pattern and is not tacky. The glue is activated using a hot iron. Clear Fuse is also nice because you can clearly see through the plasticy cellophane-like material.
Marker or Pen for tracing
Black works best. Red Sharpie has a tendency to smear or transfer when heat.
Sharp Serrated 6" Fabric Scissors
Iron
Jersey Knit Fabric or reclaimed t-shirts
you'll notice I use the terms knit or t-shirt or jersey fabrics within designs or tutorials. Jersey Knit Fabric is the type of material t-shirts are made from. My patterns and tutorials are all created with reuse in mind however you are welcome to create using purchased yardage or otherwise.
Needle & Thread
(while a great many fusible interfacings claim to be no sew... they are, and aren't to some degree. If you are planning to make something that will be used, moved, laid on, worn, or washed frequently I highly recommend sewing your applique for long lastly results.)


Next, you'll follow the manufacturer's directions on how to apply to the fabric. Many require you to use a low/medium heat setting. DO NOT overheat the fusible- the glue on these products activates at a certain point and once you go beyond that you basically burn up the glue so it is not usable. How will you know if you've burnt out your fusible? Well... it won't stick and then you'll call the manufacturer and tell them they sent you faulty product only to find out you over heated it. (Ask me how I know?) As I sit here I'm just thinking of an analogy to share- it came to me! It's similar to toasting a marshmallow- there's that juuuuuust right spot when it's kinda gooey but not too much but once you leave your stick in there too long it's just an overcooked mallow. Ew! Next. you'll cut out the shapes from your interfacing. I suggest cutting slightly away from the interfacing leaving a 1/4" past your design around the edge.

Once we apply the fusible to your fabric and it's adhered this extra bit will help to stabilize your knit or t-shirt fabrics allowing you to cut cleanly to the desired shape. If you are using an iron in this step, wait for the design to cool before cutting. Cutting too soon can cause your favorite scissors to get gunked up with glue residue over time. I would also like to mention here a little more on scissor choice. Do not try to cut fabric especially t-shirt or jersey knit materials with household scissors. It's not pretty! Garment scissors and rotary cutters work great for these fabrics but in this case, I use a medium size pair of pointy serrated edge scissors. Pictured here are blue handled Karen Kay Buckley scissors but I also really love using my KAI/Omnigrid pair for finely detailed cut outs. The serrated edge grasps the fabric edge and cuts nicely.


Layer & sew are the final steps. This flamingo applique design is a simple design compared to Ida's Garden or the like so it offers a good base to see what we have going on. What I like the to call this step is building out. It will become a little more evident here why I prefer that tacky-backed fusible. For this design specifically, I will position the body of the flamingo first. *You will need to remove any paper backing depending again on what type of product you chose. Next, I will situate the two stick legs in place before pressing. At this time I sew around the edge of my flamingo body using a slightly lengthened straight stitch. Just make sure that you start from the bottom up. Light pink feather next, then the grey elements. Stitching those down before adding the black bits in place. Everything gets sewn down when I make knit appliques because I want them to last and be loved for a long time.

If you're interested in checking out more available TrashN2Tees sewing patterns like the ones featured in this post please visit the TrashN2Tees Shop. Workshops featuring applique knit patterns can be found here. Below are some of my best selling patterns and latest releases:


Rose Patch is suited for a confident beginner and features many small precision cuts. (You can do it!) It's perfect for patching pants or adding a pop of flair to any bag or pillow.


Comments
Post a Comment